

Buy online multi color embroidery work lehenga choli in georgette fabric. Fabtopper offers an exclusive collection of latest launched wedding lehenga choli.
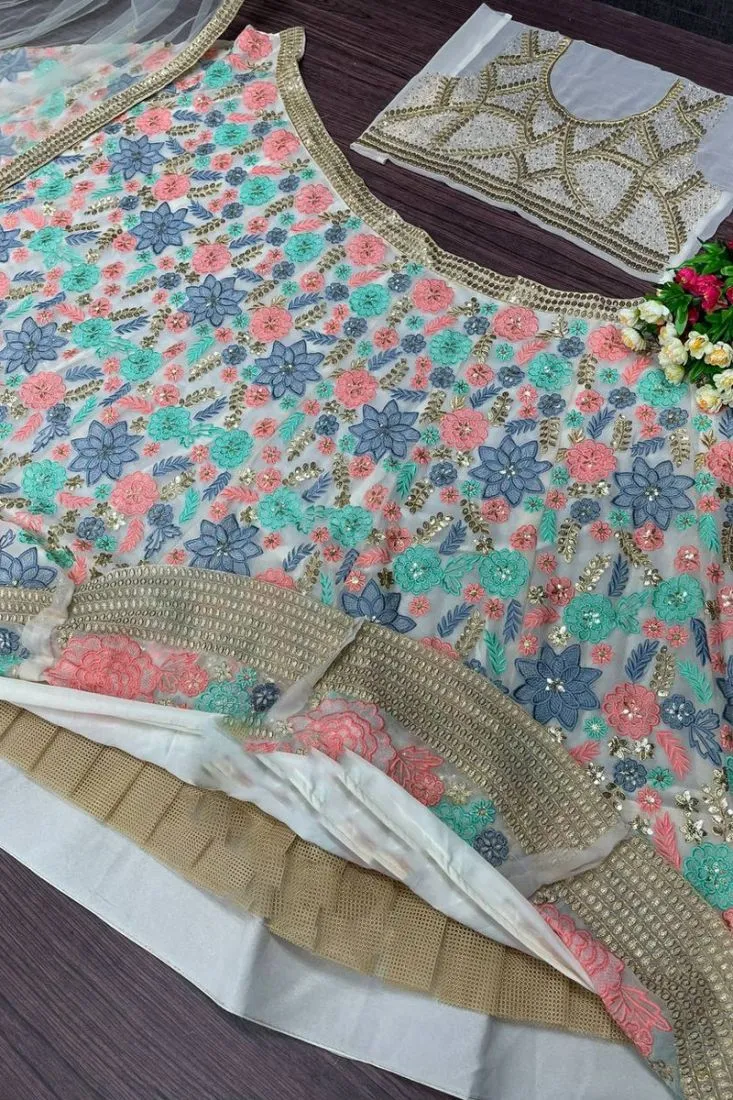
Creating a stunning choli like the one in the image requires a blend of craftsmanship, embroidery skills, and fabric expertise. Whether you are a designer, a tailor, or a fashion enthusiast, this guide will help you understand the detailed process in simple words.
Step 1: Gathering Materials
Before starting, collect the following materials:
- Fabric: Raw silk, velvet, georgette, or net fabric, depending on the look you want.
- Lining: Soft cotton or satin for comfort.
- Embroidery Materials: Beads, sequins, pearls, thread, and stones.
- Needles & Thread: Choose embroidery needles and strong threads for stitching.
- Tailoring Tools: Scissors, measuring tape, chalk, and a sewing machine.
Step 2: Taking Measurements
The fit of a choli is crucial, so take the right body measurements:
- Bust – Measure around the fullest part of the bust.
- Waist – Measure at the narrowest part of the waist.
- Shoulder Width – Measure from one shoulder bone to the other.
- Armhole – Measure around the arm where the sleeve will be attached.
- Blouse Length – Decide how long you want the choli to be.
Step 3: Cutting the Fabric
- Lay the fabric flat and mark the measurements using chalk.
- Cut the front and back pieces separately.
- If the design has princess cuts or darts for better fitting, mark and cut accordingly.
- Cut the sleeves and attach extra fabric for fringes or detailed embroidery.
Step 4: Stitching the Base
- Sew the darts on the front side to give a structured shape.
- Join the shoulder seams of the front and back pieces.
- Attach the sleeves and finish the armholes neatly.
- Sew the sides of the choli carefully.
- Add a zipper or hooks at the back for closure.
Step 5: Embroidery & Embellishments
This choli has heavy embroidery, so follow these steps:
- Tracing the Design: First, outline the floral patterns on the fabric using chalk.
- Threadwork: Use silk or metallic threads to fill the floral designs.
- Bead & Pearl Work: Hand-stitch beads and pearls onto the floral outlines.
- Sequin & Mirror Work: Attach sequins and tiny mirrors for an elegant shine.
- Fringe Work: Stitch the fringes on the hem of the choli to give a graceful look.
- Final Finishing: Use a lining fabric inside to cover embroidery stitches for a comfortable feel.
Step 6: Final Stitching & Finishing Touches
- Hem the edges neatly to prevent fraying.
- Press the choli with a steam iron to settle the embroidery.
- Attach tassels or latkans at the back for an extra stylish look.
- Double-check the fitting and make any necessary adjustments.
Reviews
There are no reviews yet.