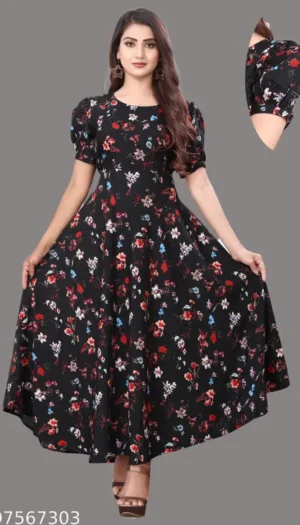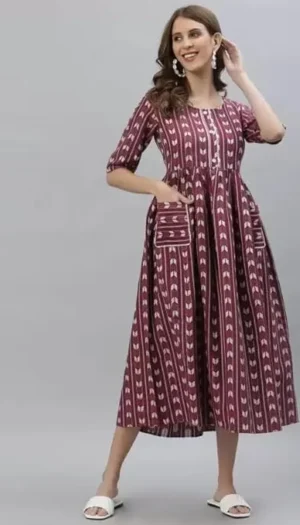
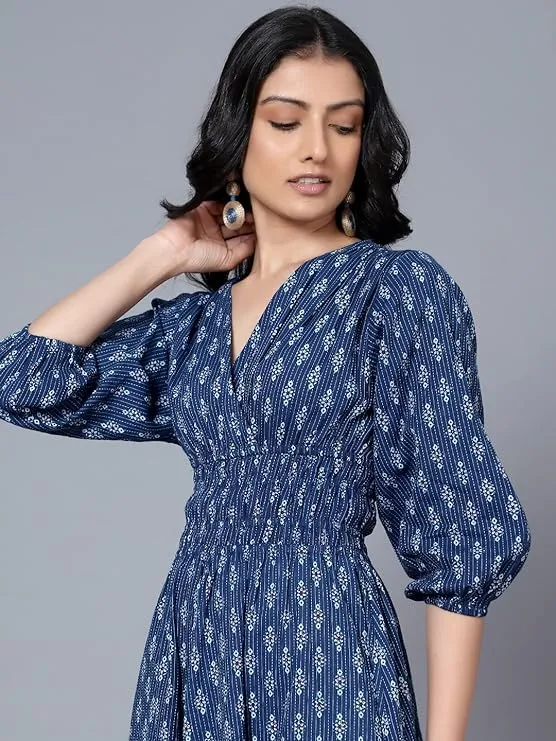
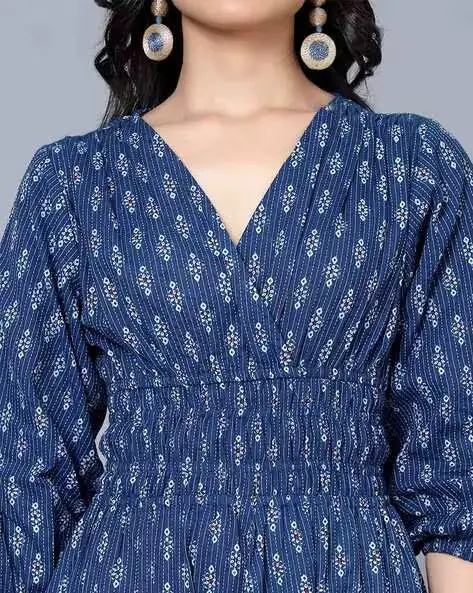
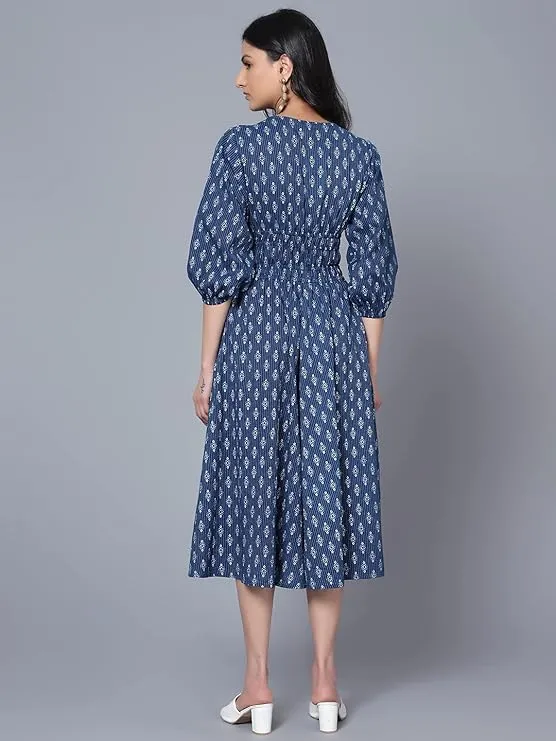
A Printed V-Neck Fit & Flare Dress is a timeless and stylish outfit that suits various occasions. Whether you’re making it for casual wear, a party, or a special event, this dress is flattering on all body types. This guide will walk you through the entire process in a simple, human-friendly way so that you can easily understand and follow along.
Step 1: Choosing the Right Fabric
The beauty of a fit & flare dress comes from its flowy and structured look. The fabric plays a key role in achieving this.
✔ Best Fabric Choices:
- Cotton: Perfect for a breathable and comfortable feel.
- Rayon: Drapes well and gives a soft, flowy effect.
- Chiffon: Light and elegant, great for a dressy look (needs a lining).
- Georgette or Crepe: Adds a touch of sophistication with a graceful fall.
Since we’re making a printed blue dress, choose a fabric with a beautiful floral, abstract, or geometric print. Make sure to wash and iron the fabric before cutting to avoid shrinkage later.
Step 2: Taking Measurements
For a perfect fit, you need to take proper body measurements.
📏 Essential Measurements:
- Bust
- Waist
- Hips
- Shoulder Width
- Dress Length (from shoulder to desired hemline)
- Armhole (if adding sleeves)
✨ Pro Tip: Always leave ½ inch extra on each measurement for seam allowance.
Step 3: Drafting & Cutting the Fabric
-
The Bodice (Top Part):
- Draw and cut the front and back pieces based on your measurements.
- Shape the V-neck at the front using tailor’s chalk.
- For a fitted look, add darts (small folds sewn into the fabric for shaping).
-
The Skirt (Flared Bottom Part):
- Circle Skirt Method: If you want a super flared look, use the circle skirt pattern.
- Gathered Skirt Method: Cut a rectangular piece (about 1.5x your waist size) and gather it for a flared effect.
- Panel Skirt Method: Cut multiple A-line panels and stitch them together for a flowy look.
-
Sleeves (Optional):
- If you want cap sleeves, puff sleeves, or 3/4 sleeves, cut them separately and keep them aside.
✂ Cut all fabric pieces carefully and mark the stitching lines using tailor’s chalk.
Step 4: Stitching the Dress
-
Start with the Bodice:
- Stitch the front and back pieces together at the shoulders.
- Sew side seams to shape the dress.
- Finish the V-neckline with bias tape or facing for a clean, professional look.
-
Attaching the Skirt:
- If using the gathered method, run a loose stitch at the top of the skirt and pull the thread to create gathers.
- If using the circle or panel method, simply join the pieces together.
- Attach the skirt to the bodice by aligning the waist seam carefully.
-
Adding Sleeves (If Needed):
- Attach and stitch the sleeves neatly.
- Finish the armholes with a smooth edge to prevent fraying.
-
Zipper or Buttons:
- A concealed side zipper is best for a seamless look.
- If you prefer buttons, place them at the back or side for an elegant touch.
Step 5: Hemming & Finishing Touches
-
Hemming the Dress:
- Fold and stitch the bottom edge for a neat finish.
- You can also use a rolled hem for a professional touch.
-
Final Pressing:
- Iron all seams to set them in place.
- Use steam pressing for a smooth and polished look.
-
Adding Personal Touches:
- A fabric belt or waist tie can enhance the fit.
- Add lace or decorative trims to the neckline or sleeves for extra charm.
Final Look & Styling Ideas
Congratulations! Your Printed V-Neck Fit & Flare Blue Dress is now ready. 🎉
👗 Pair it with:
- White sneakers for a casual day out
- Strappy heels for a party look
- A denim jacket for a trendy vibe
- Statement earrings to complete the outfit
Now, go ahead and twirl in your handmade masterpiece! 💃